Monday, August 28, 2017

Hunstville Plastic Modeler's Society, 2017


This weekend was once again the annual show for the Huntsville Plastic Modeler's Society, so I swung by to check it out.  The number of entries seemed down this year.  I grabbed a few photos of some pieces I thought were pretty nice or that interested me, and breezed through the vendor area rather quickly.  You can find more information regarding the HPMS here.


Check out the lighting!

Ok, time to get over the Star War fixation.

Lighting was pretty bad in this area.


Again, the photos are not really representative of all the categories or number of entries.  These are merely the ones I wanted to capture.  There were a lot of car model and modern fighter jets that just did not cry out to me.  And yes, Star Wars and WWII planes cry out to me pretty loudly.

All in all, like last year, a fun diversion for a hour on a Saturday.

Monday, August 21, 2017

Konflikt 47 - British Automated Infantry (MMG)

Well, here is another side project I have been working on:

The other 2 are painted, just not shown.  And look, I think
I finally got a decent photo!
I still have a few things left to finish up, along with the basing but I think these guys are mostly done.  For a fairly uninteresting model, I felt like these turned out pretty well and I am happy with them.  Of course they were not terribly difficult, just some quick airbrush work got 80% of the model done and then it was just painting a few details and some washes.

I'm not sure the white dot on the red lenses is appropriate, given how much that area is shadowed by the helmet, but I like how it draws my eye to that area and also helps bring the red out, so I think it's going to stay.  I also think the dials and the star (both white on the torso) need to be hit with a wash to make them look slightly dirty.  I haven't really decided though.  I'm also considering some slight battle damage/chipping and maybe bit more work on the lens.  We'll see.

The real downside though is putting these guys together.  Both legs are separate from the torso, so that creates a nightmare to getting a good solid bond while simultaneously trying to get a decent pose out of them.  But that nightmare turned out to be trivial when compare to attaching both arms to the torso AND the machine gun!  I have another squad of 5 of these guys that I am really not looking forward to.  That batch I may do some rust weathering on.

Anyway, that gets my Konflikt army started off.  Now I gotta jump back on Tail Feathers for my daughter.  She's getting a little tired of my "distractions."  Of which there are a few more distractions on my hobby desk right now too.

If I ever need to come back to it, here are the paints I used:

  • Main Body:  RMS Muddy Olive (S), RMS Olive Green (B), Mix of RMS Olive Green and RMS Pale Olive 2:1 (H1), RMS Olive Green and RMS Pale Olive 1:1 (Highlight2)
  • Vessels:  RMS Cloudy Grey (B), RMS Cloudy Grey and RMS Misty Grey 2:1 (H1), RMS Cloudy Grey and RMS Misty Grey 1:1 (H2)
  • Gun:
    • Black Portion:  Vallejo Panzer Aces Dark Rubber (B), Vallejo Panzer Aces Dark and Light Rubber 1:1 (H1), Vallejo Pazner Aces Light Rubber (H2)
    • Brown Portion*:  RMS Uniform Brown (S), RMS Green Ochre (B), RMS Faded Khaki (H)
  • Piping:  Terran Khaki (B)
  • Bullets:  AP Greedy Gold and AP Gun Metal
  • Lenses:  RMS Bloodstain Red (B), RMS Clotted Red (H)
I used washes to take care of most the shading:
  • Gun:
    • Black Portion:  AP Dark Tone (selectively in recessed areas)
    • Brown Portion:  AP Strong Wash
    • Body/elsewhere:  AP Strong Wash
      • First application all over but trying to avoid pooling in raised areas (which was only somewhat successful)
      • Second application in select areas such as recessed or shadowed areas.
*Note to self, the brown portion of the gun using Green Ochre as a base was a nightmare to highlight up to Faded Khaki.  It just seemed like whatever I did it still ended up just looking like the base color and I eventually gave up.  

Sunday, August 6, 2017

July Recap

A fairly light July for me but I did get one miniature game last month with the local group.  It was another game of 2v2 Konflikt 47 and was a lot of fun.  The game hinged on a single event though, an event that went it our favor (12 inch heavy bombardment from off board) that knocked at least 3 units out I believe.  Game wise, the only other thing I managed to fit in was a few games of Milles Bornes with my daughter on our family beach vacation.

Painting wise, I finished the base colors on 3 of the Mousling Foot Soliders for Tail Feathers.  But I've been putting off the detail work until I get the other 3 Mouslings done.  And I have been putting off working on those 3 Mouslings to work on some other things.  lol.  One of which was finishing up my Space Battleship Yamato model from the Bandai Mecha Collection.  There was no gaming purpose to it, just a fun little distraction.

Other than, not much new to report on yet.  I did unfortunately have to cancel my trip back to the DC area for the NOVA Open.  We decided to pull our family vacation to Disney World forward to October, which means I'm in a pretty serious crunch vacation wise and financially to be ready for that trip, so going to the NOVA Open had to be sacrificed.

None the less, I am looking forward to August.  I should be able to kick out a couple more projects, get a few games in and behold all the beautiful stuff and news out of Gencon.

Tuesday, August 1, 2017

Distracted - Space Battleship Yamato

Since finishing up the Ratling Foot Troops for Tail Feathers, I've indulged myself with a slight distraction (actually 2 but this is the only one I will share right now).  It's been a very on and off again project.  It started a couple of months ago when I randomly stumbled upon a beautiful Space Battleship Yamato scale model build and had to resist the urge of my base instincts, which were "I must own and build this!"  Come on, look at it:

Sadly, not my model.
How can one resist that?  It was actually easy for me, mostly, because of the size of the models.  I really do not need something that big, let alone making my first foray into scale modelling with something as big as most of these kits.  That is until I stumbled across Bandai's Mecha Collection.  Oh dear...

A nice little model of the Yamato, only 5 inches long?  And only
$10?  I must own you.
The kit was really not that hard to put together or to clean up.  Actually, I would say outside of having more steps and pieces, it was about as easy as most multi-part 30mm (ish) models I typically mess around with.  Despite a total of 29 pieces, I think this still managed to come in with a lower part count that Robotech Tactics model!  Ok, not really but it was still a worthy insult.  The instructions, due to the limited space, require a bit of staring at but I love the efficient use of materials to provide them:

You have to admit, that is efficient!
My intent was always to paint it, but you can settle for not
painting it.  If so inclined.
I decided to keep certain pieces unassembled for the painting process.  Yes, even though it's colored plastic already I planned on painting to try to unlock all of it's glory.  Or at least as much of it as I could.

*sigh* I really hate assembling models after I've painted them.
*holding breath*
Unfortunately, keeping the upper and lower hull in separate pieces is not an option.  That meant after my base coating, I needed to mask off the lower hull to paint the upper hull (I fully realize I should have done it the other way around.  At least now I do.  lol.  I think).  This resulted in heartbreak when the masking tape pulled off a big chunk of paint and I spent the next hour repairing it.  Then another hour+ trying to airbrush the rest of the upper hull using an old CCG card to mask/protect the lower hull.  Miniature assembly and painting would be so much easier if we humans had a third arm.  Anyway, here is a picture at that point after a gloss coat:


For the next phase, and the reason for the gloss coat, I planned on doing a pin wash for the panel lines.  Since this was a first for me, it required some sagely advice from my buddy John over at 40k Hobby Blog.  Although I did not heed his advice to use enamels instead of oils (because I did not feel like ordering and waiting for enamels to arrive), I tackled this step with a bit of confidence.  That was till I started putting those first few pin washes on:  Watching all my hard/careful work get messy, praying that it will come off like they say its supposed to, praying that you got a good gloss coat on, etc:

Ok, I got a little to messy with the pin wash.
After the pin wash was cleaned up, I began the final assembly.  Here is where it stands right now:

Hmm, I think I've done pretty well..  A couple of warts though.
There are some issues with it at this point.  Most noticeably the super structure and the bow are not a consistent color to the hull.  I can live with the super structure being a different shade as it very well could be constructed of slightly different materials and/or painted slightly differently.  The bow, not so much.  Additionally, not shown by the photo, is the fact that there is a very bad "step" at the hull and bow attachment.  I think, after I have set this aside for a bit, I will attempt to smooth that step away with some green stuff.  Then I will have to repaint the bow, which gives me a chance to correct the inconsistent colors.  Outside of that, the only other thing I want to do is paint some of the windows green.  Like I said though, I'm going to set this aside for a bit because even with it's warts, I'm really happy with it.

It was a really fun little projected and a nice diversion.  Overall, I happy with the quality vs time I spent on the model, for once.  Of course, that is mainly due to being able to use the airbrush almost exclusively.  It was also a nice exercise for improving my airbrush skills and also served as my first foray with pin washes.  Much like the chipping I did with my vehicular combat car, I will approach this task next time with much more confidence.

Down the road, I will have a second go of this model.  I ended up damaging the superstructure on my first build of this.  I tried to roll with it but eventually conceded to ordering a second kit just for the superstructure (the kit only costs $10).  So what is one to do with a second kit, with a damaged superstructure?  A battle damaged Yamato!  Eventually...  I might even have a few more models from this collection.  Maybe.

Lastly, I found the transformation process extremely rewarding:

Vanilla:
Not a bad little model straight out of the box, but a
little toy-ish to me.
To:
It may not be "great" but I'm pretty proud of this.
For my future reference, colors used:

Greys:  RMS Stormy Grey (Shade), RMS Cloudy Grey (Base), RMS Misty Grey (Highlight)
Reds:  RMS Bloodstain Red (Shade), RMS Clotted Red (Base), RMS Carnage Red (Highlight)
Brown (Decking):  RMS Leather Brown
Pin Wash:  Burnt Umber oil, with a little Black oil mixed in

Now, back to some Tail Feather models before my daughter finds out I have not been working on them.  Shhh.


Sunday, July 9, 2017

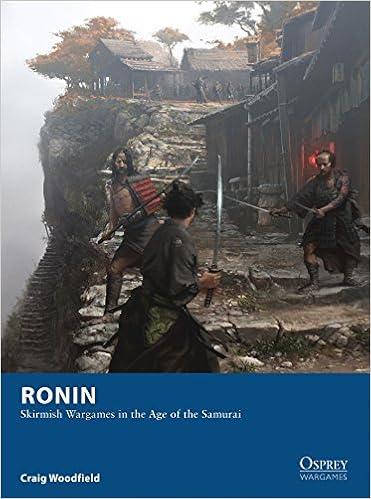
Rules Review - Ronin


Ronin was another Samurai skirmish ruleset that I wanted to review.  It's a ruleset from Osprey Publishing that came out a couple of years ago.  Despite picking this rulebook up literally days after it was available, I had never sat down and actually read the rules.

Scale of Game & List Building:
The rulebook states that Ronin is intended for 4-20 miniatures per side and suggesting that 100 points should equate to < 10 figures and about an hour of game time.  So it sounds in line with my taste.

The force composition rules are not as simple to summarize though.  The first thing to understand that each potential member of your force can have a Rank of 0 through 5.

  • Rank 0:  Basically a peasant that has picked up arms
  • Rank 1/2:  Basic troop
  • Rank 3/4:  Elite troop
  • Rank 5:  Best of the best
Depending on the faction you choose to play, you will get various composition requirements based on the ranks above.  For instance, one faction may say that you can only have one Rank 3 troop, per every Rank 1 troops your force has.  Additionally, many forces dictate that no more than 50% of your force may be armed with missile weapons and no more than 25% of force can have a teppo (flintlock rifles).

Given the typical composition rules, it would seem to me that no matter the point total you and your opponent agree upon, you will probably tend toward the higher end of model counts.  Still, 20 figures is within my preference level.


Standard Rules:
Ronin is basically an alternating activation system, although this occurs at the phase level.  There are 5 phases to each turn:  Priority, Move, Combat, Action, End.  The Priority phase simple determines who can go first for each of the Move, Combat and Action phases and is handled with a simple d6 roll off.  As far as I recall, nothing else factors into this roll off (it would have been nice to see some modifiers/something that added a little more depth than just a random roll).  Morale is also handled during this phase.  The End phase is simply a maintenance/clean up phase, so timing is simultaneous.

The Move phase is actually exactly how it sounds, although there is one exception.  Movement is standard for all troops:  6 inch standard move, 9 inch run with modifiers for certain conditions.  The interesting part of the Move phase is that it is an "opportunity" to shoot.  I say opportunity, because you can also shoot range weapons in the Action phase.  Even if you shot during the Move phase.  Yes, you can shoot twice per turn (this is potentially ok though, as I will eventually discuss) unless it is a weapon that requires reloading (teppo).  Shooting during the Move phase is considered a hurried shot and suffers a penalty.

The Combat and Action phases are also exactly what they sound like.  Combat resolves all the melee combats and the Action phase is where actions are performed, including standard shooting.

In each the Move, Combat and Action phases the player with priority determines who goes first.  After the first players action, it alternates to the other player and so on until all models have acted or passed.

Since shooting can first occur during the Move phase, let's discuss how that is resolved.  Shooting is simply a 2d6+characteristic+/-modifiers against a target number of 6.  If successful, the damage is equal to the difference.

Combat, is actually resolved a little differently and is little shocking at first.  The Ranks of the models involved determines each sides combat pool.  This combat pool is secretly divided between Offense and Defense.  Initiative is determined for each model involved in the melee with a d6+modifier roll and the highest initiative get an opportunity to to attack.  If the model does attack, it removes a Offense token for his sides pool.  It's then a 2d6+modifiers roll against the targets 1d6+modifier roll.  This is where I was scratching my head a bit, since that seems a bit "unfair."  Well, the reason is each side actually gets a chance to "enhance" their roll by removing another appropriate token from their pool and if you are paying attention, the defender has not spent any tokens yet.  So if the target has no defense tokens, or chooses not to use them, then I guess the philosophy is that it's not trying very hard to defend itself and therefore should be easier to hit.  Interesting.

Note though, I said each side can "enhance" their attack.  If the attacker does enhance its offense for that attack they get an additional die, bringing it up to 3d6, but can only keep the best 2 results so its not quite as huge of an advantage as a straight 3d6.  Like shooting, if successful the damage is determined by the difference.  Then you move to the model with the next highest initiative and basically wrap and repeat until no offense tokens remain.

Damage is also kind of interesting, as models do not have a number of wounds.  Which seems really weird given I have just been talking about damage being the difference between 2 numbers.  This is because damage equates to a level of wounds, and wounds stack up to higher level wounds:

  • Damage 1:  Stunned
  • Damage 2/3:  Light
  • Damage 4/5:  Grievous
  • Damage 6:  Critical (killed/out of action)
While stuns do not "stack" in the sense of a cumlative effect, you do track each stun because during the end phase a variable amount of them are removed.  A light wound on top of a light wound is upgraded to grevious.  A model with a grevious wound that suffers any wound (even stun it appears) is upgraded to critical. Note my wording in these, it appears intentional that if a model has a light wound and then suffers a grevious wound then it only has a grevious wound.  Appears is the key word though.  Wounds also impart modifiers on several things (movement, combat modifiers, etc).

Beyond that, the rules allow for basic special rules (kinda like key words), mounted models, special attacks (disarm or subdue), and weapon specific modifiers and special rules.


Other Things:
The rulebook is fairly well laid out although there are a couple of minor issues, IMO.  The first is my (and a lot of other gamers) typical gripe in that there is no index.  Yes, it kind of does not need one since it is fairly short the Table of Contents does manage fairly well.  Still, when will people learn that "we" want indexes.  The second is the rules could be better broken into clearly distinct sections.  Things just seems to roll from one topic into another without much notice, making it slightly confusing (or making me just an easily confused old man).

There are a lot of different factions to choose from that can be very distinct just from the composition rules alone.  There is a suggestion for a campaign advancement system but nothing strictly laid out.  There are also advance rules for adding in another tactical layer via fatigue and a resilience stat, which seem kind of odd to me to have these as an advance rule as the game overall seems simple enough to tolerate this additional layer.

The scenarios seem a bit of an after thought.  VPs for a scenario are primarily driven by the Rank of the models killed.  But each player also randomly determines a secondary objective for the game, worth 5 VP.  Which is certainly enough to swing the game, it just does not seem like enough to back off the typical kill everything you can approach.

Some Issues:
I really not seeing any major/obvious issues with the rules.  In fact, I am pretty interesting to see how the entire combat pool thing works out for melee.  I may not like it though, its a little tough to say.  I am also still a little concerned that archers can shoot twice in one turn and damage is determined against a static number (that is slight below the mean for 2d6 rolls).  I believe that most factions limiting the number of range weapons to 50% is an attempt to offset this.  I also think that it maybe balances that melee guys can technically attack multiple times in a turn if they have a high combat pool and allocate it to offense.

I think the rules are really crying out for an expansion.  I would love to see better scenarios that really drive the encounter, rather than after thoughts.  A better advancement system would be great to, as would be a nice narrative campaign system wrapping around all of it.  Top of that expansion book with some options to add more fantastical elements to the game.  That being said, the game has been out for a couple of years now and we have not seen any additional support so I would not hold my breath.

Conclusions:
I think if you are interested in Samurai skirmish games, I think Ronin is worth trying out.  Given its one of the Osprey wargaming books, it is pretty cheap (I think I paid $14?).  I'm interested to see how the combat pool mechanic works out.  That being said, I am not particularly excited to try it and I can't really figure out why.  The only thing I can think of is;  If I threw down pirate models and changed the names of weapons and armor, then there would be nothing "samurai-ish" left to make it feel like I was playing with the wrong models.  What would make a game, any, feel "samurai-ish"?  I don't know.

Anyway, with this being my third review for samurai skirmish rules, you would think I had a bunch of models painted up waiting to go.  Wrong.  LOL.

Adding this to the list of games of this genre:  Samurai Skirmish

Friday, July 7, 2017

June Recap

So the month of June was pretty good hobby wise.  Due to an influx of TV shows hitting Netflix, I actually got a lot hobby time in.  The amount of hobby time also seemed to stem from juggling 3 projects at the same time.  Odd that would work better for me, but if I was burned out on one, I could just switch to one of the others.  I should be ready to share all 3 of these projects in July.  But here is progress on Tail Feathers:

New phone with better camera soon, I hope.
I also got back in the habit of going to the local game days that occur every two weeks.  The first one was a bust:  I brought Star Wars Armada stuff to demo for a friend of one of the local regulars but the guy did not show.  But at least it got me out of the house.  The second one, I participated in a 2v2 game of Konflikt 47, playing a borrowed Russian list.  It was a pretty fun game and I have since gotten in a second game.  I might post up some thoughts on the game/rules.

I continued to get a few board games in June too.  After a few more plays of Tsuro, my daughter has learned another level to playing:  "Stay away from daddy's piece."  lol  We also tried out a new game (for us) called Doodle Quest.  I was not actually interested in Doodle Quest for myself, but it is a game that could improve her hand-eye development a lot, or at least it would seem to me to have that potential, so I picked it up for her.

Other than that, I'm headed to the beach on "vacation" next week.  Anyway, hopefully it will give me a chance to post up my thoughts so far on Konflikt 47 and I've got a couple more rulesets I want to read through.

Oh yeah, one last thing.  There was a kickstarter that almost broke me out of my anti-kickstarter shell:  John Wick launched a kickstarter for a board game called War of the Cross.  Set in the world of 7th Sea, I was really interested in this one but the kickstarter kinda fell flat.  It has since been pulled and hopefully will return stronger and better.

I also made this:


I keep all my paints in a drawer, so I thought this would be pretty helpful when try to color match or determining color schemes.  It was partly motivated by my vacation next week too:  I've got a couple of color schemes I want to think through and thought this would be helpful in figuring them out.  I have tried something like this out before, just with a simple journal, but did not like it because it was hard to add things where I wanted them and also it would (sometimes) not allow me to compare things side by side (unless I wanted to rip one of the sheets out).  I can also hold these pieces right next to a painted sample for a better look.  At the very least it was a good diversion one night when I didn't feel like doing "real" hobbying.

Anyway, hopefully some more updates/etc coming soon.

Saturday, June 10, 2017

Tail Feathers - Ratling Foot Troops

So, just a quick (hopefully) update on some painted models.  I finished my first batch of Tail Feather models:  6 ratling foot troops.  I'm not really excited about how they turned out, although I am not that displeased either:  I was just trying to get something decent ready for the table.  I still have to figure out what I am going to do for the basing but I think it is probably just going to be a standard flocking.


Anyway, in case I need to refer back to it in the future (doubtful):

Basecoat:
  • Pants:  
    • RMS Templar Blue (2 figs)
    • Vallejo Dark Rubber (2 figs)
    • Vallejo Light Rubber (2 figs)
  • Fur:  
    • RMS Aged Bone (for white rats)
    • RMS Dark Skin (for brown rats)
  • Skin/Flesh:  
    • RMS Aged Bone + RMS Carnage Red (for white rats)
    • RMS Tanned Skin (for brown rats)
  • Backpack:  RMS Uniform Brown*
  • Armor:  Dave Taylor's Polished Steel Recipe*
  • Leather:  RMS Earth Brown
  • Crossbow:  RMS Rich Leather
  • Eyes/Arrow Feather:  RMS Carnage Red
  • Teeth/Claws:  RMS Faded Khaki
  • Arrow Shaft:  RMS Earth Brown
  • Bones:  RMS Aged Bone
Highlights:
  • Pants:  None
  • Fur:  Worked up to
    • RMS Polished Bone (for white rats)
    • RMS Dark Skin + RMS Aged Bone* (for brown rats)
  • Skin/Flesh:  None
  • Backpack:  Several washes of RMS Green Ochre*
  • Armor:  Dave Taylor's Polished Steel Recipe
  • Leather:  Worked up to RMS Leather Brown
  • Crossbow:  RMS Polished Brown
  • Eyes/Arrow Feather:  None
  • Teeth/Claws:  None
  • Arrow Shaft:  None
  • Bones:  RMS Polished Bone
Shading:
  • All:  Thinned AP Strong Tone Wash, several controlled applications
It was a conscious decision to skip a lot of highlighting in certain areas and a bit of a test to see how that would turn out.  The lower parts of the body and small details, for what I was trying to achieve (passable tabletop), just did not seem worth the time investment.  Similarly, I also wanted to see how the AP Strong Tone wash would turn out and if I would be happy with "cutting that corner."  I think the results are "ok."  I do wish they had turned out a little better and I am still not happy with how long it took to get them done.  I of course will try again on the next batch (Tail Feather mousling foot troops).  My daughter though is very happy with how they turned out and the purpose of painting these up are to play with her, so I guess that is a big win!

Overall I think, as usual, I did not get enough contrast in the models and failed to push my highlights and shadows far enough.  I do think in a couple of areas I pushed further than I have in the past, so maybe there is hope for me in that regard.  lol

Anyway, I need to jump on the next batch.  Well, after a short (I hope) distraction.

*Notes:
  • Backpack:  The RMS Uniform Brown I used for the backpack totally failed me.  For some reason when the paint dried it was severally cracked.  Since I figured it was the paint going bad, I had to step "over" to using RMS Green Ochre, applying several thinned applications to "hide" the cracking.  This caused an overall color shift that left me a little unsatisfied but not unhappy enough to do anything about it.
  • Armor:  Dave Taylor's Polished Steel recipe was a bit of a mistake, I actually intended for a darker, grittier looking armor but for some reason used this recipe instead of his Dark Iron recipe.  I tried a few extra applications of AP Strong Tone to "shift" it in that direction but ultimately just decided to roll with it as you see.
  • Fur (brown rats);  RMS Dark Highlight produced no perceivable gradient shift from the RMS Dark Skin basecoat, so I tried adding in RMS Aged Bone.  It didn't really seem to work out all that great (or I did not push the contrast far enough).  A suggestion was to use a more "flesh" color than the aged bone, so I will try that next time I am in this situation.  
  • Varnishing:  The picture above is un-varnished.  Since it was taken, I have hit the models with a gloss coat to prepare for the basing and maybe just a bit of weathering.  This has really washed out any highlighting/shading on the them.  I know when I apply the dull coat they should "come back" but I'm holding my breath until then.